
Figures
Here are all the figures (charts and visuals) featured in Automate Your Busywork.
Click here to download them all.
Figure 1.1 The automation flywheel (p. 21)
Chapter 1: Automation Fundamentals, Section: Introducing the Automation Flywheel


Figure 2.1 The Eisenhower matrix (p. 51)
Chapter 2: Divide and Conquer, Section: CONQUER: Spotting and Plotting Workflows
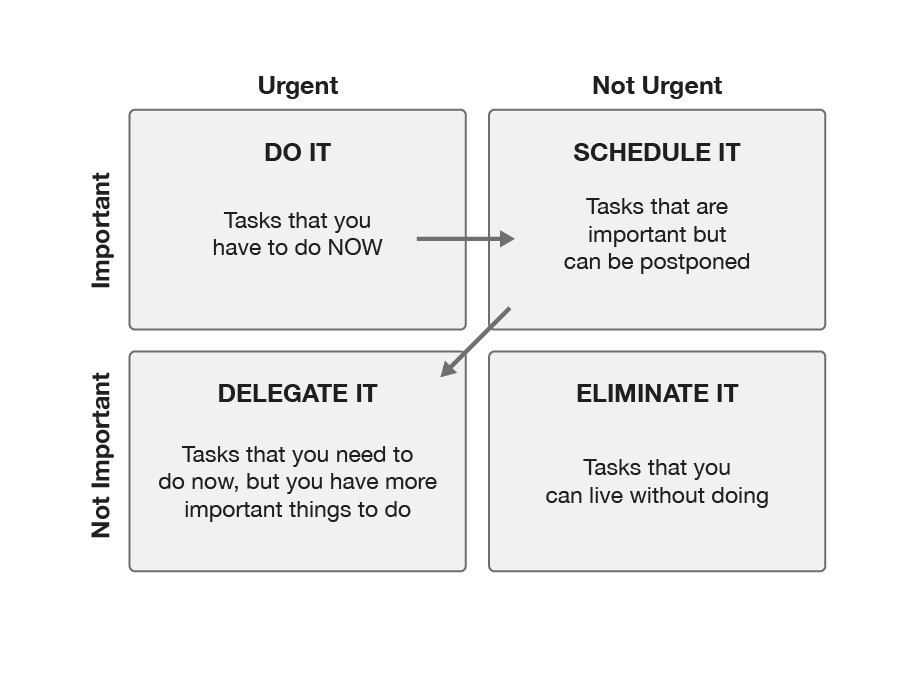
Figure 2.2 The Eisenhower matrix with use case example (p. 52)
Chapter 2: Divide and Conquer, Section: CONQUER: Spotting and Plotting Workflows
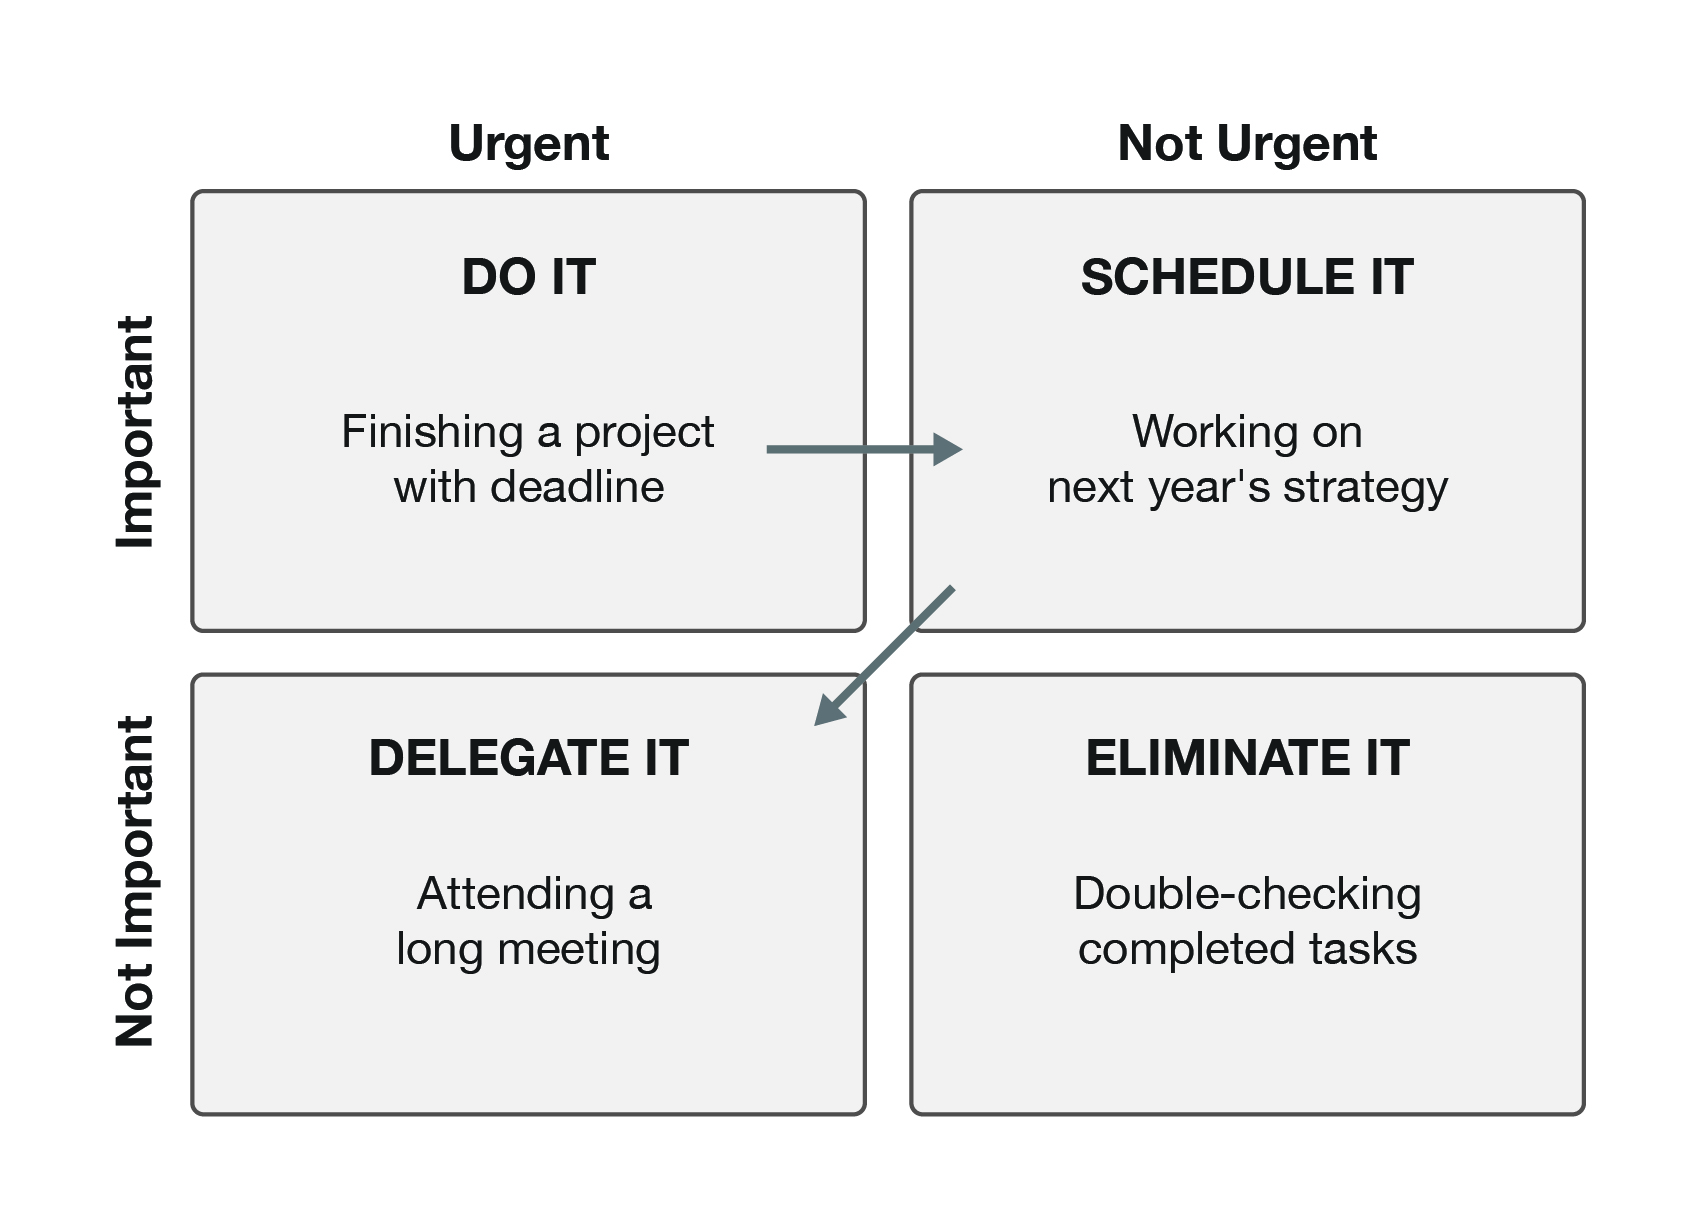
Figure 2.3 Sample impact/effort workflow scores (p. 53)
Chapter 2: Divide and Conquer, Section: CONQUER: Spotting and Plotting Workflows
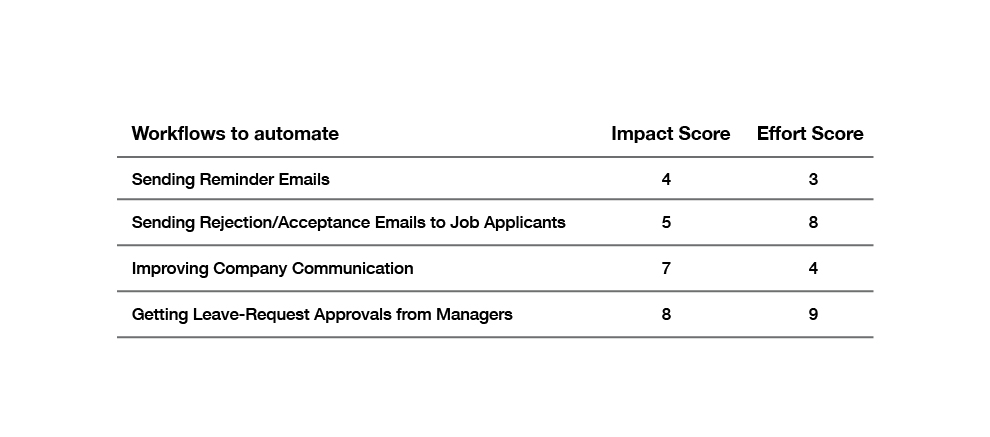
Figure 2.4 Sample scores plotted on the impact/effort matrix (p. 53)
Chapter 2: Divide and Conquer, Section: CONQUER: Spotting and Plotting Workflows
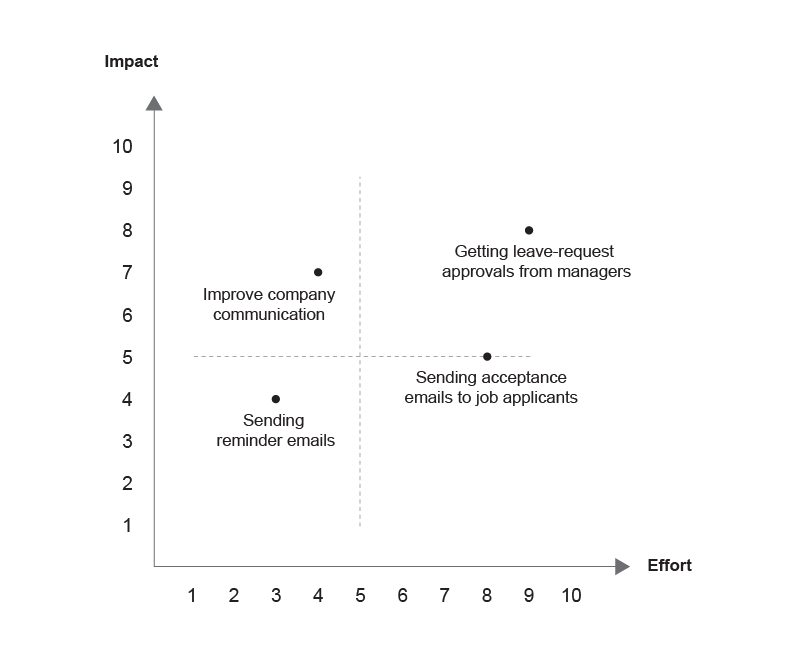
Figure 3.1 Sample workflow diagram (p. 63)
Chapter 3: Design and Implement, Section: DESIGN: The Power of Maps
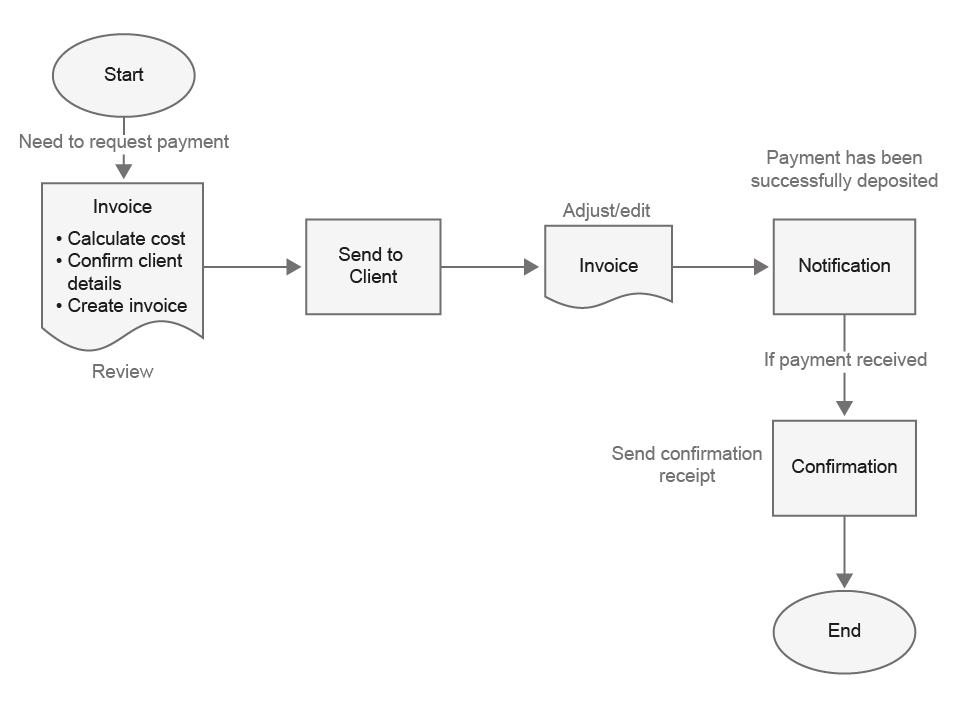
Figure 3.2 Common workflow symbols (p. 64)
Chapter 3: Design and Implement, Section: DESIGN: The Power of Maps
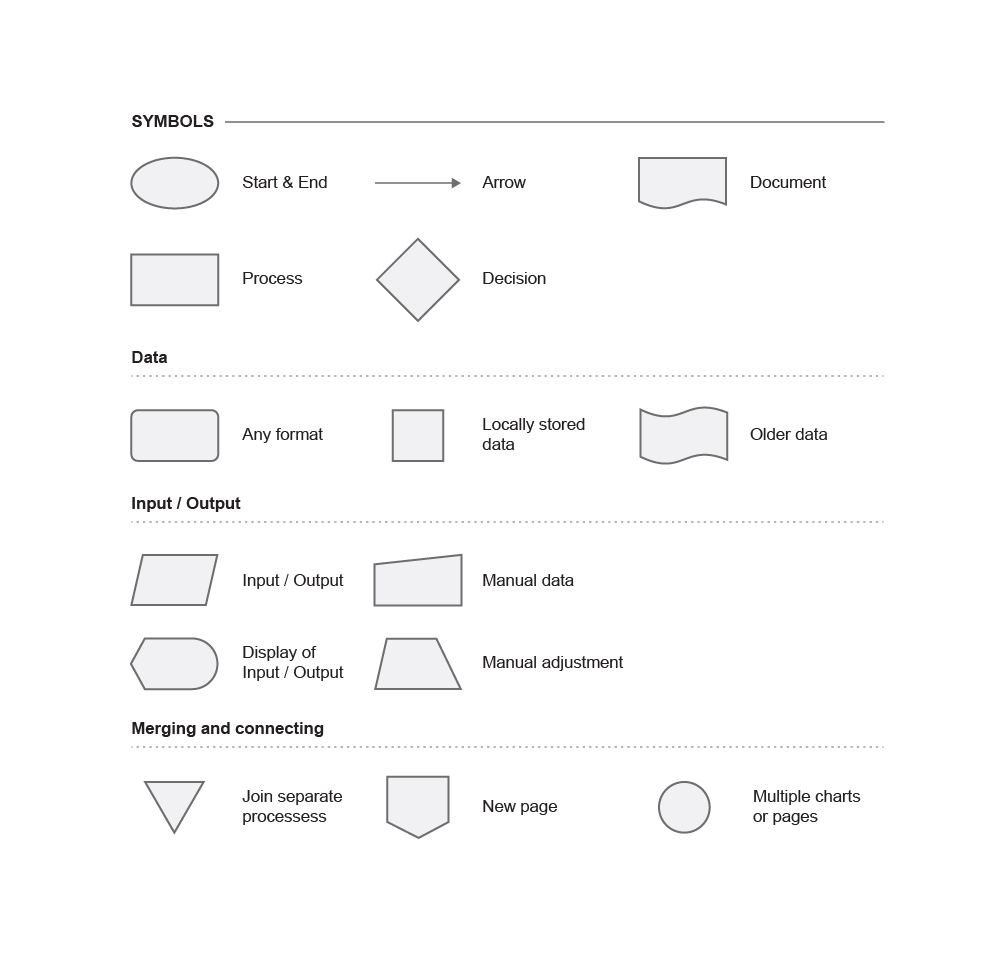
Figure 3.3 Single-module workflow (p. 72)
Chapter 3: Design and Implement, Section: DESIGN: The Power of Maps
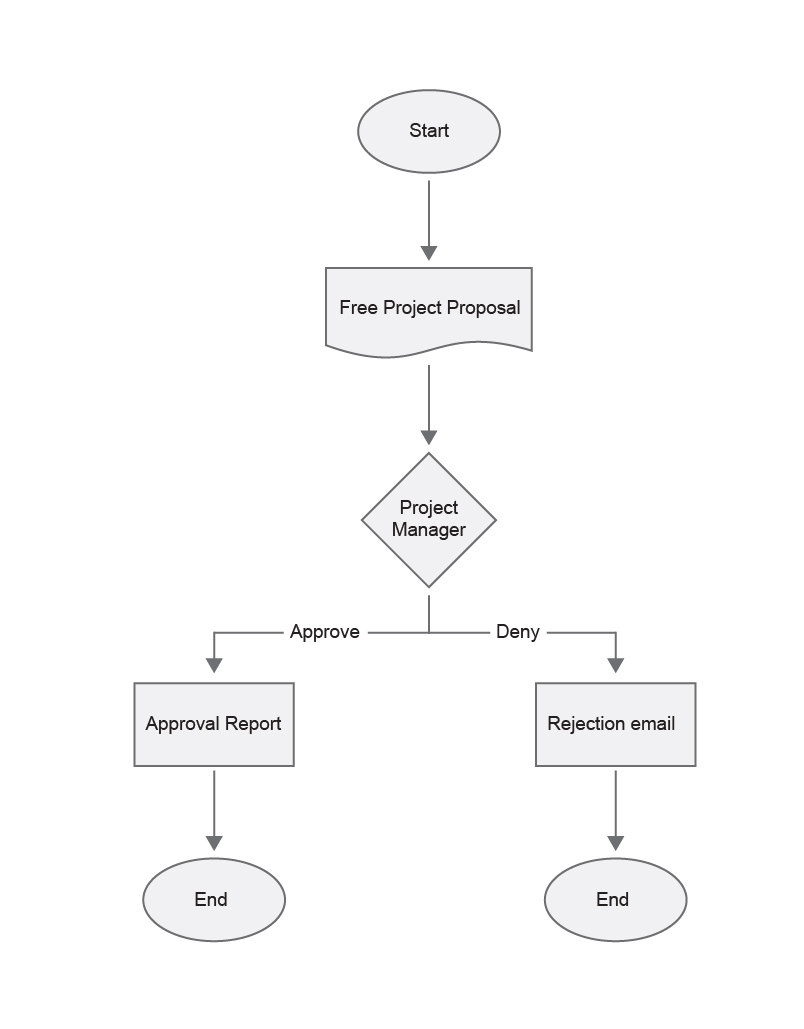
Figure 3.4 Multiple-module workflow (p. 73)
Chapter 3: Design and Implement, Section: DESIGN: The Power of Maps
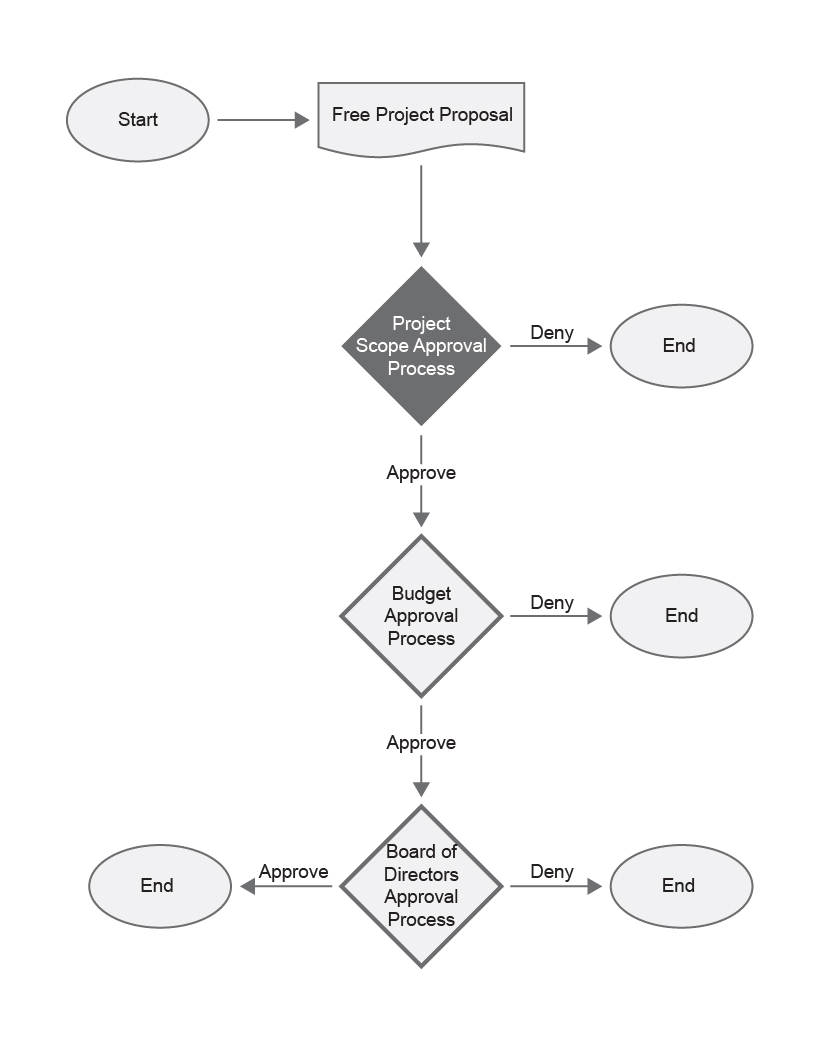
Figure 3.5 Example workflow indicating unnecessary steps (p. 75)
Chapter 3: Design and Implement, Section: DESIGN: The Power of Maps
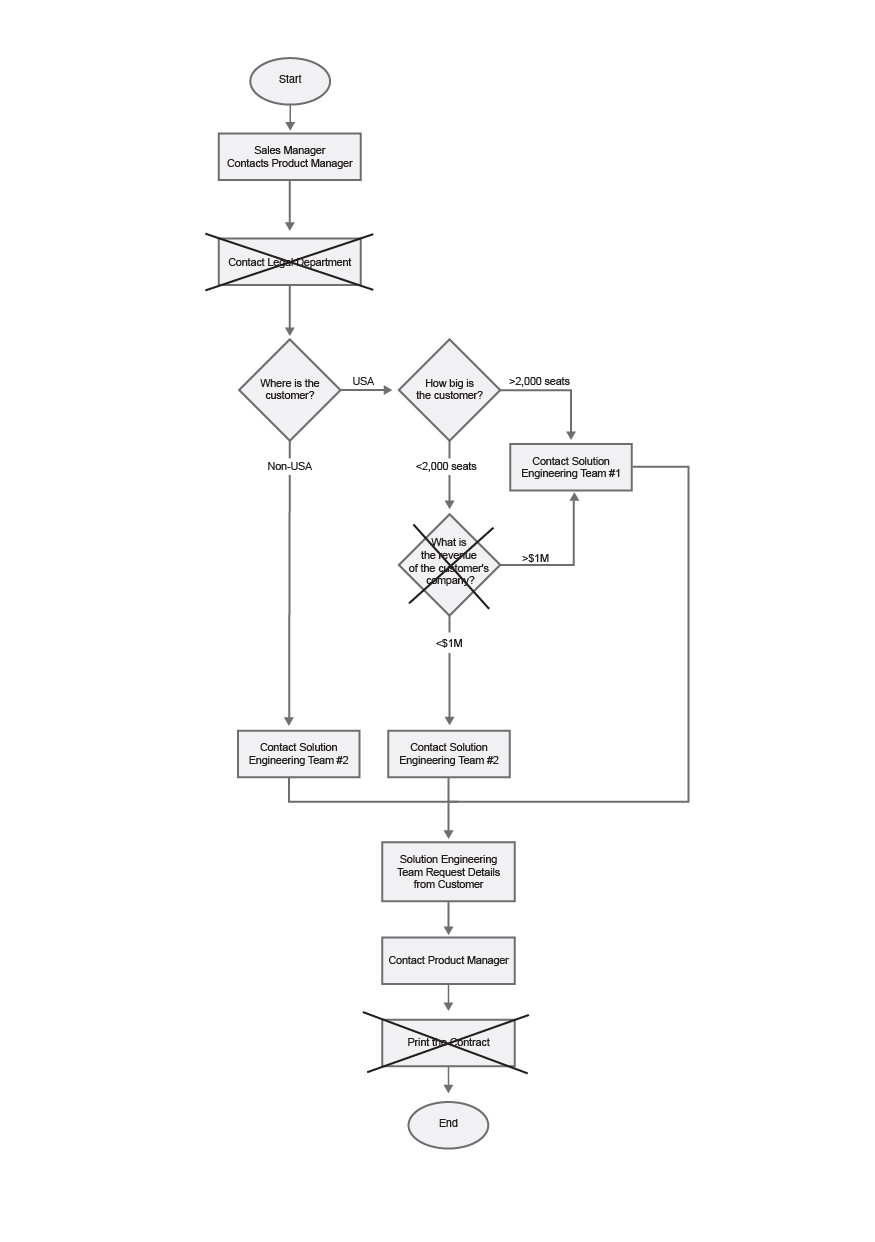
Figure 3.6 A more complicated workflow (p. 76)
Chapter 3: Design and Implement, Section: DESIGN: The Power of Maps
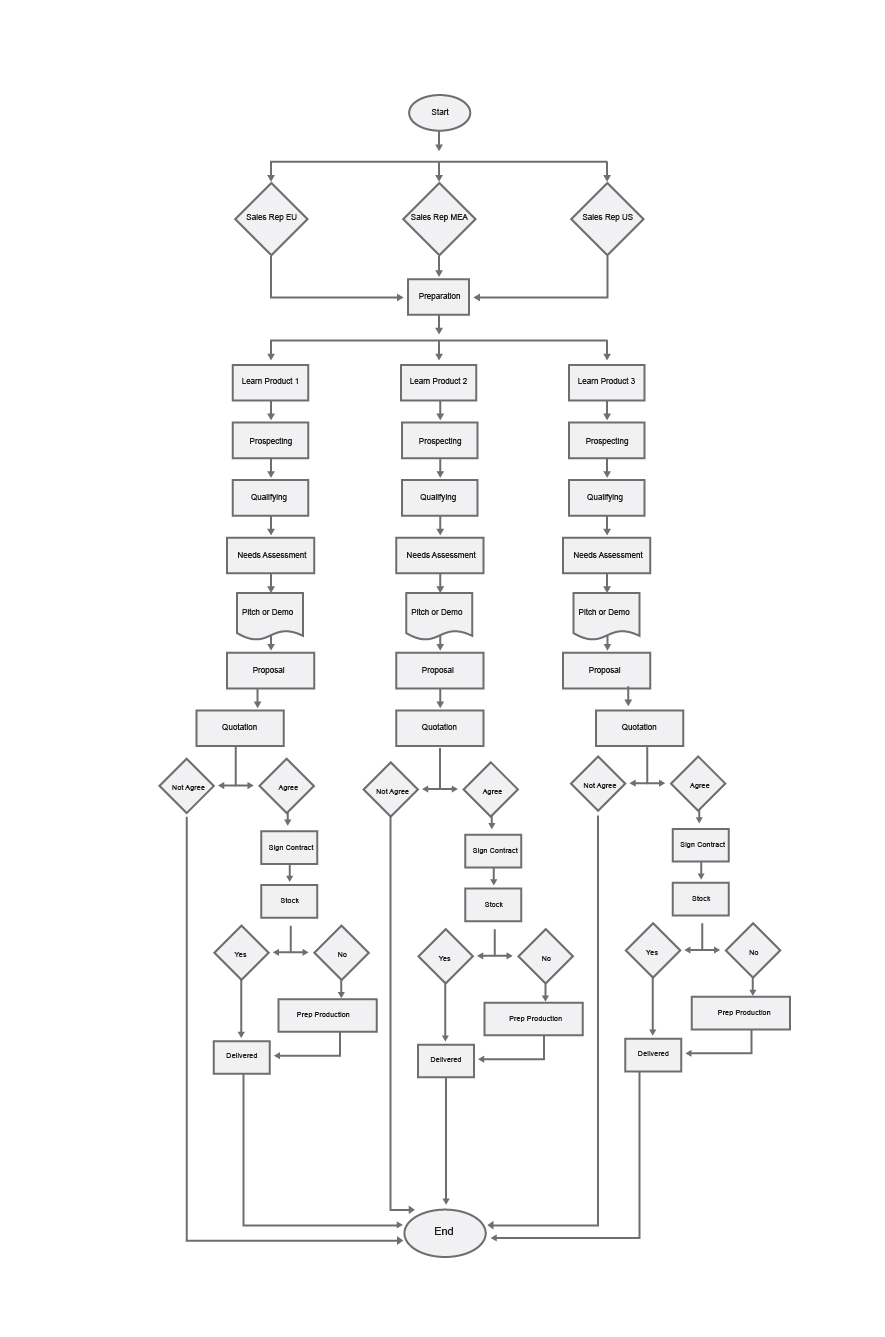
Figure 3.7 Detail of complicated workflow (p. 77)
Chapter 3: Design and Implement, Section: DESIGN: The Power of Maps
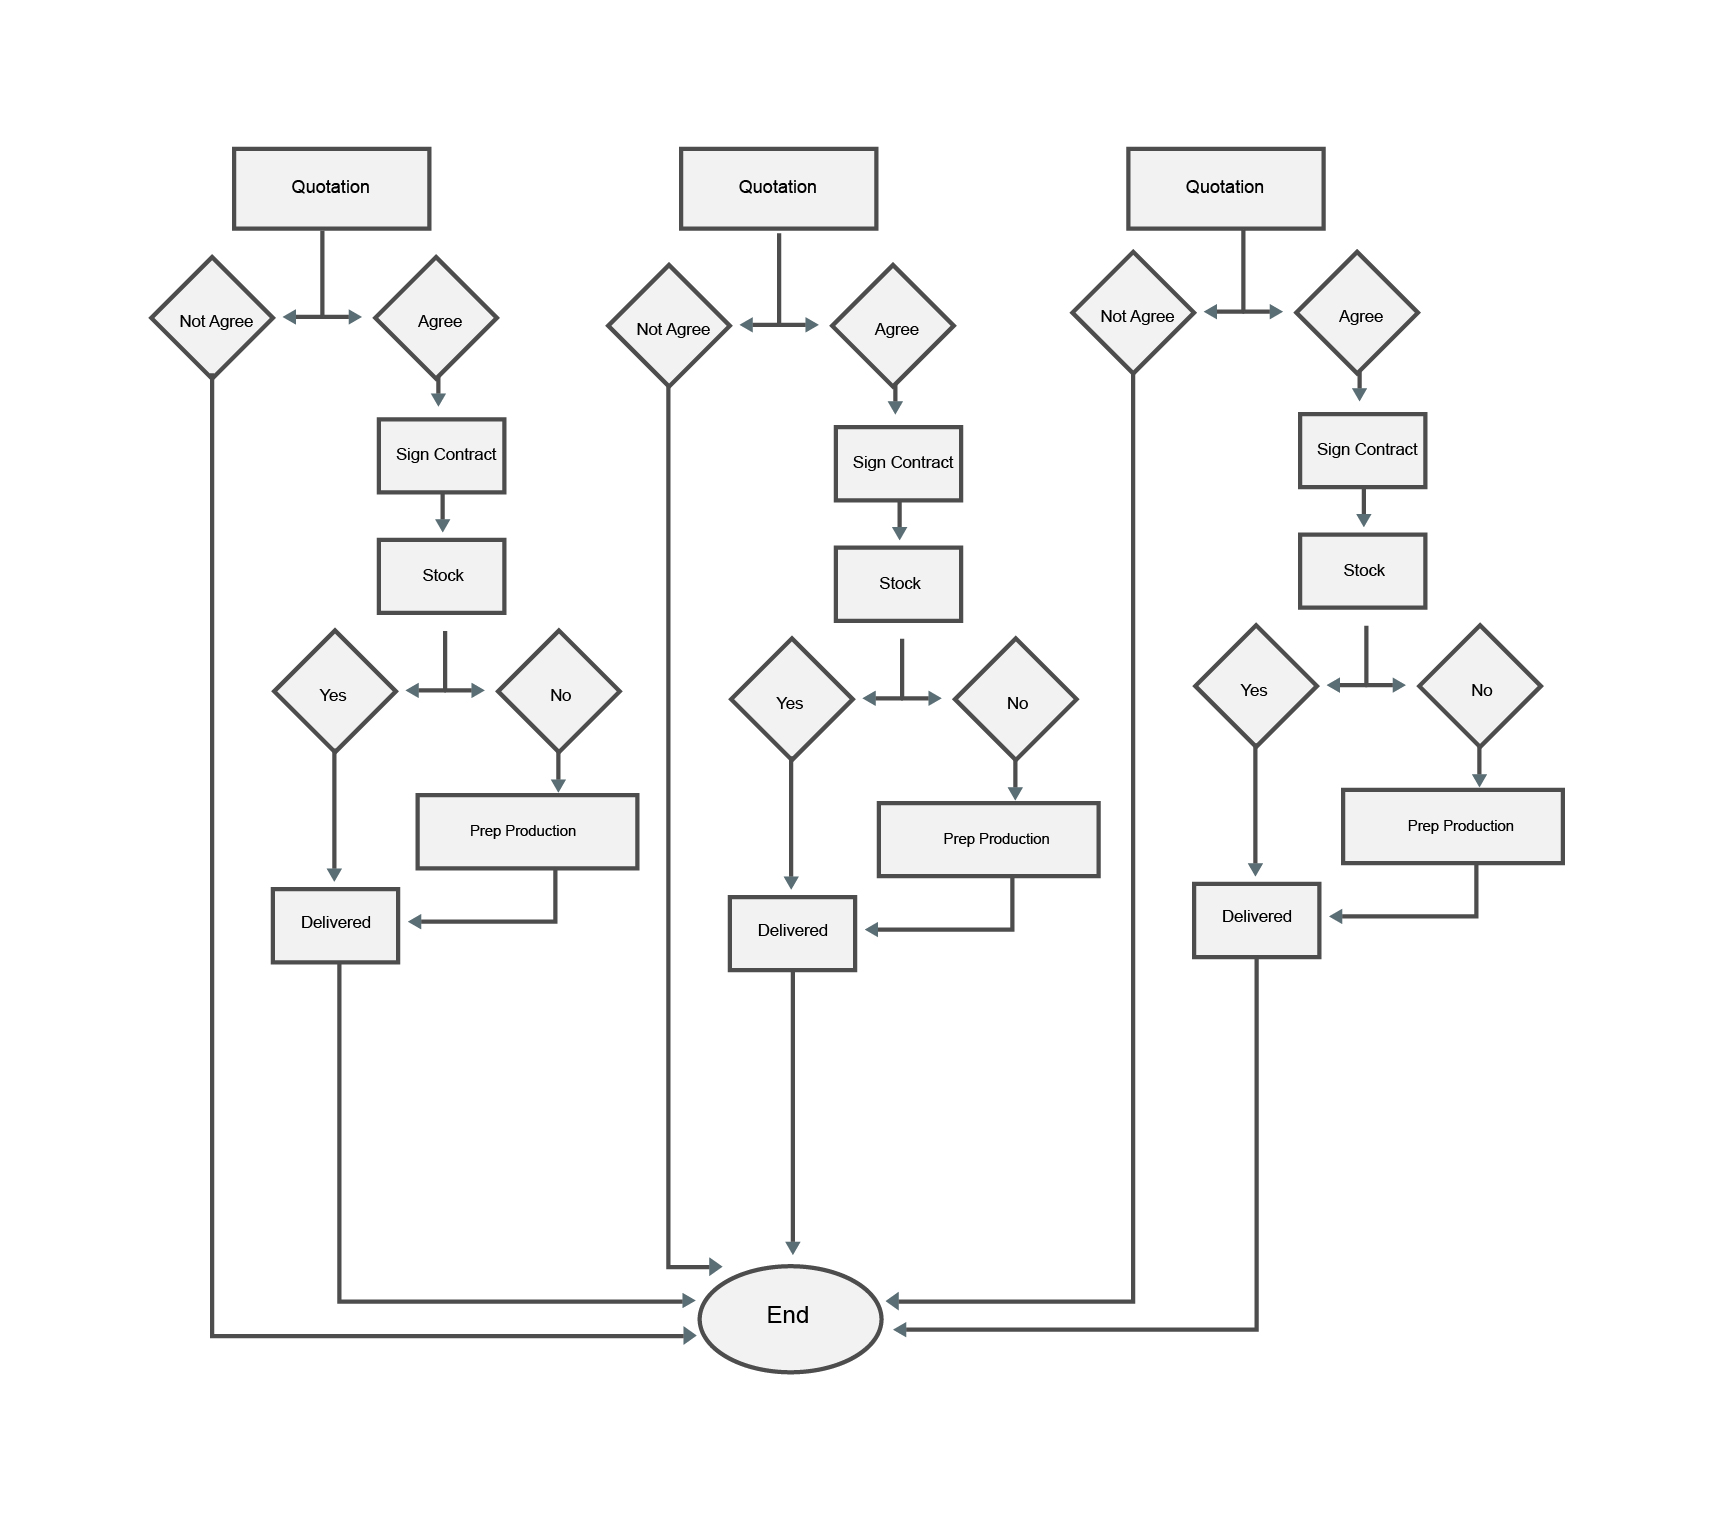
Figure 3.8 Individual workflow tasks (p. 78)
Chapter 3: Design and Implement, Section: DESIGN: The Power of Maps
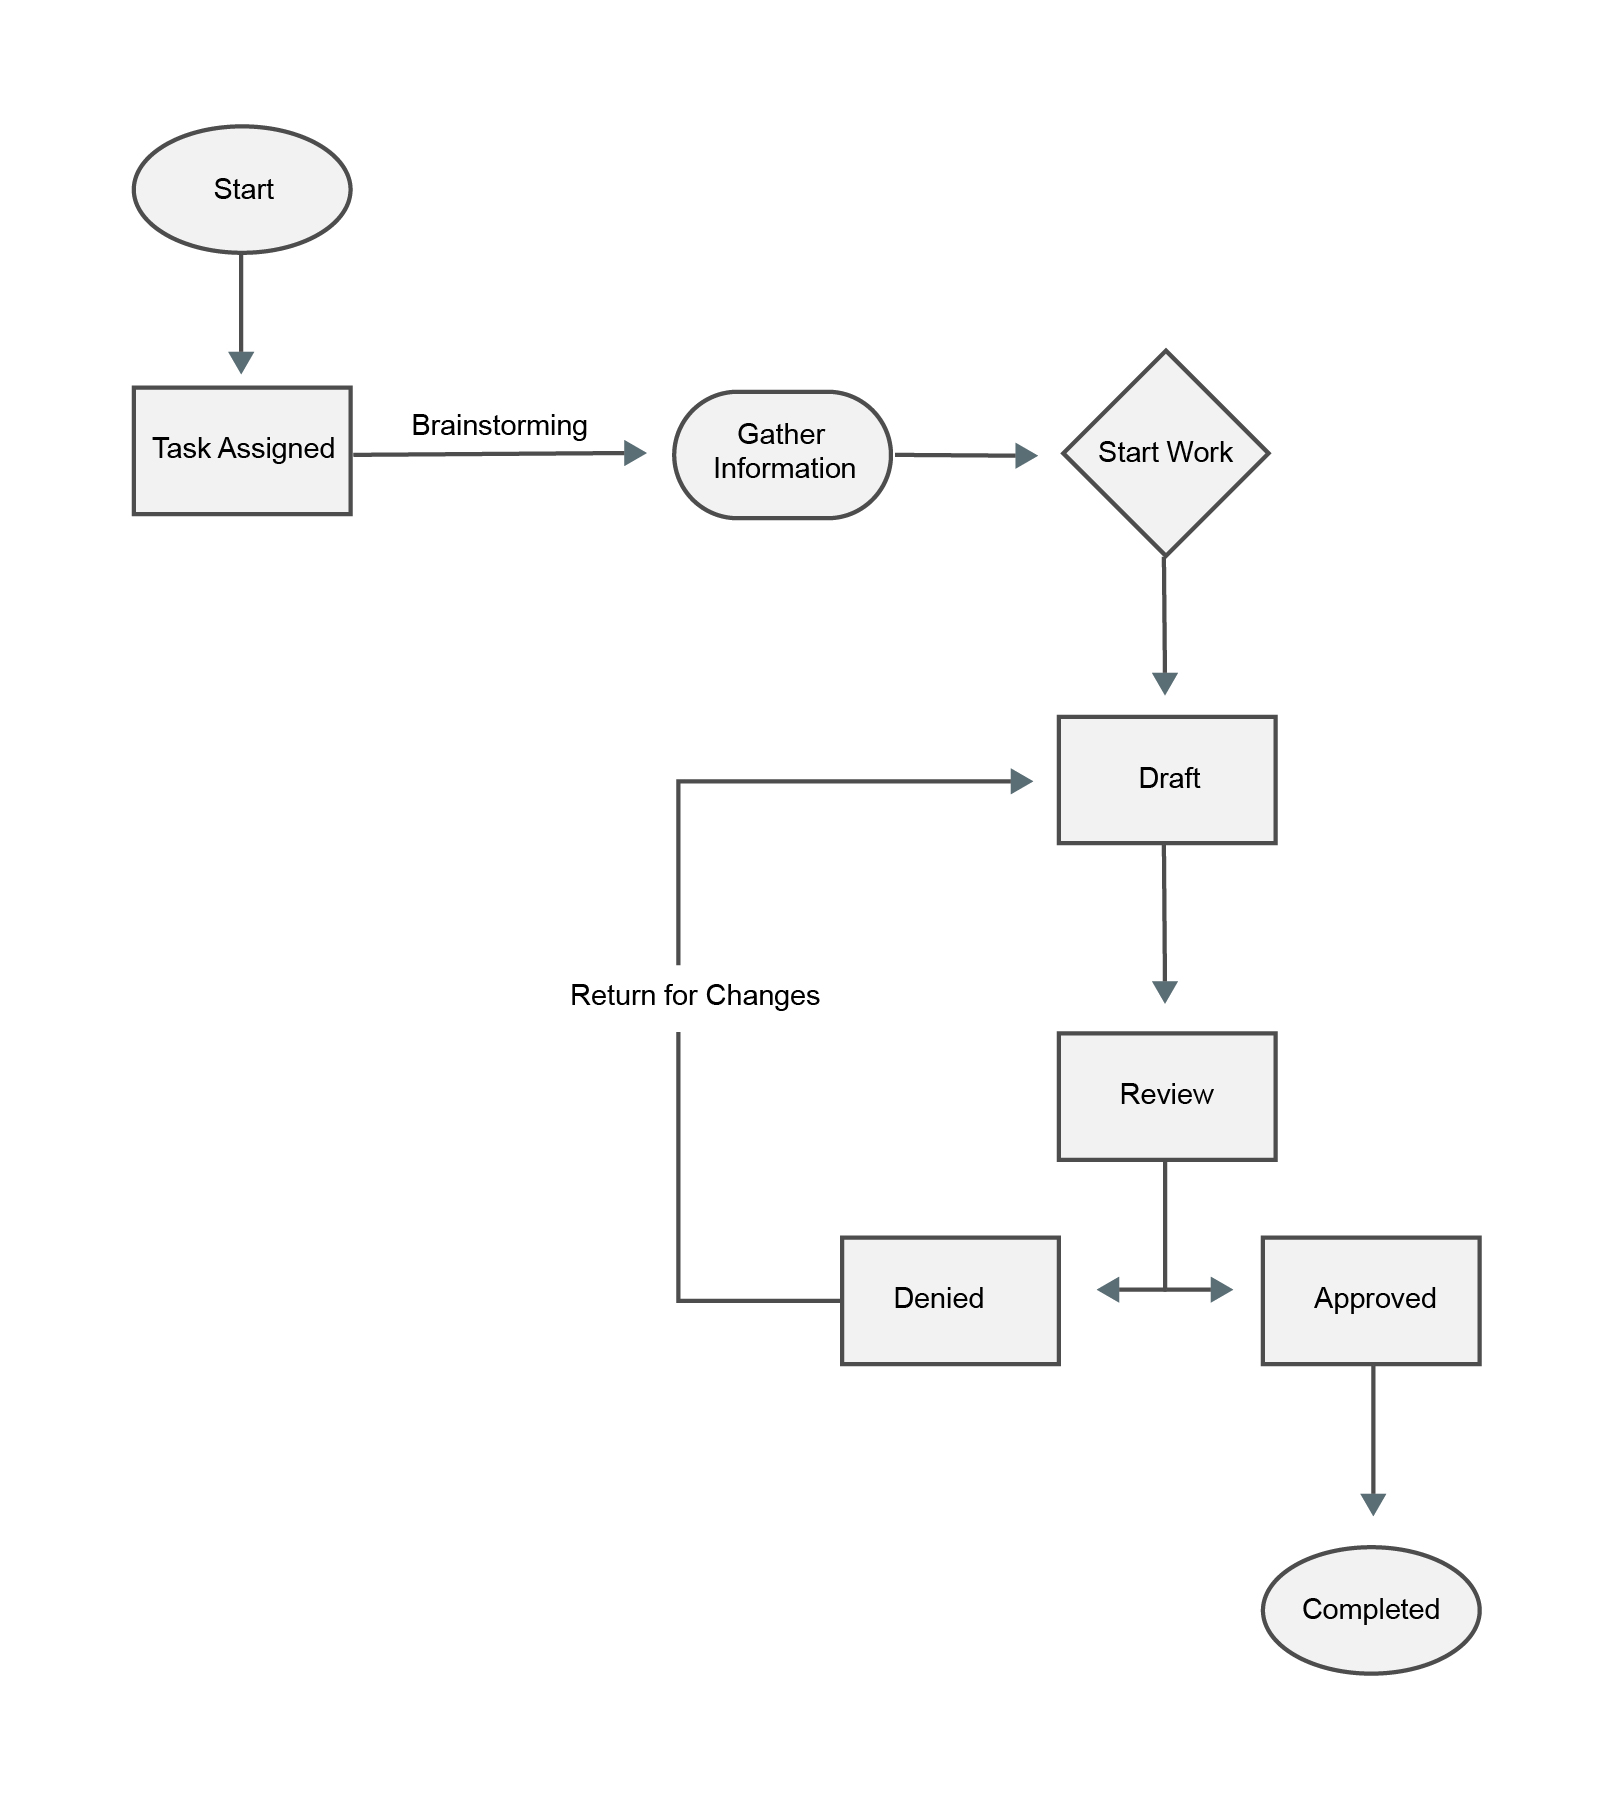
Figure 3.9 Example cyberthreat workflow (p. 79)
Chapter 3: Design and Implement, Section: DESIGN: The Power of Maps
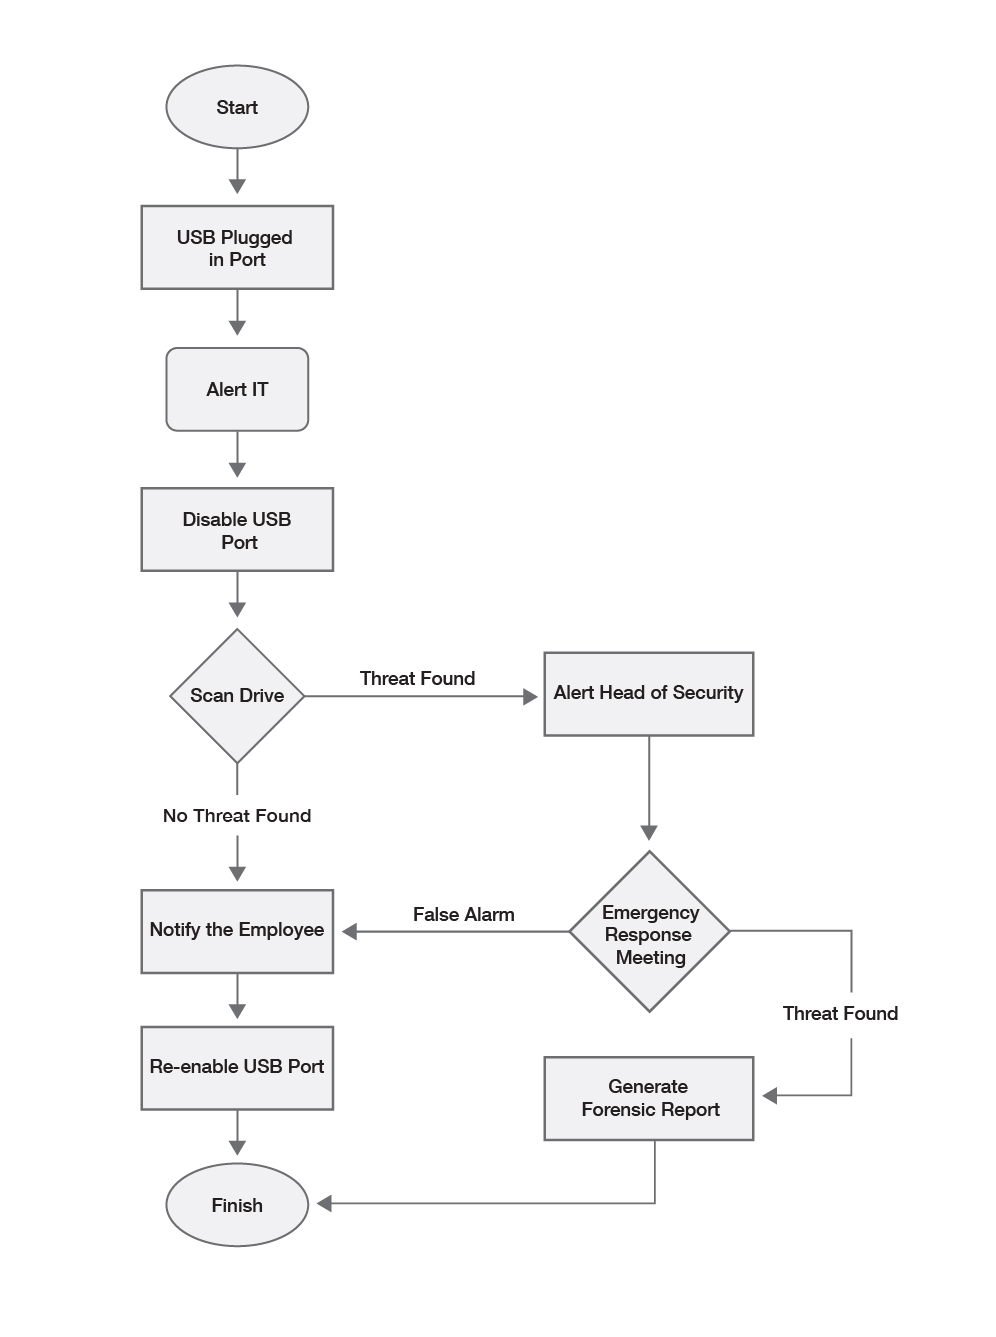
Figure 3.10 Example employee expense reimbursement workflow (p. 80)
Chapter 3: Design and Implement, Section: DESIGN: The Power of Maps
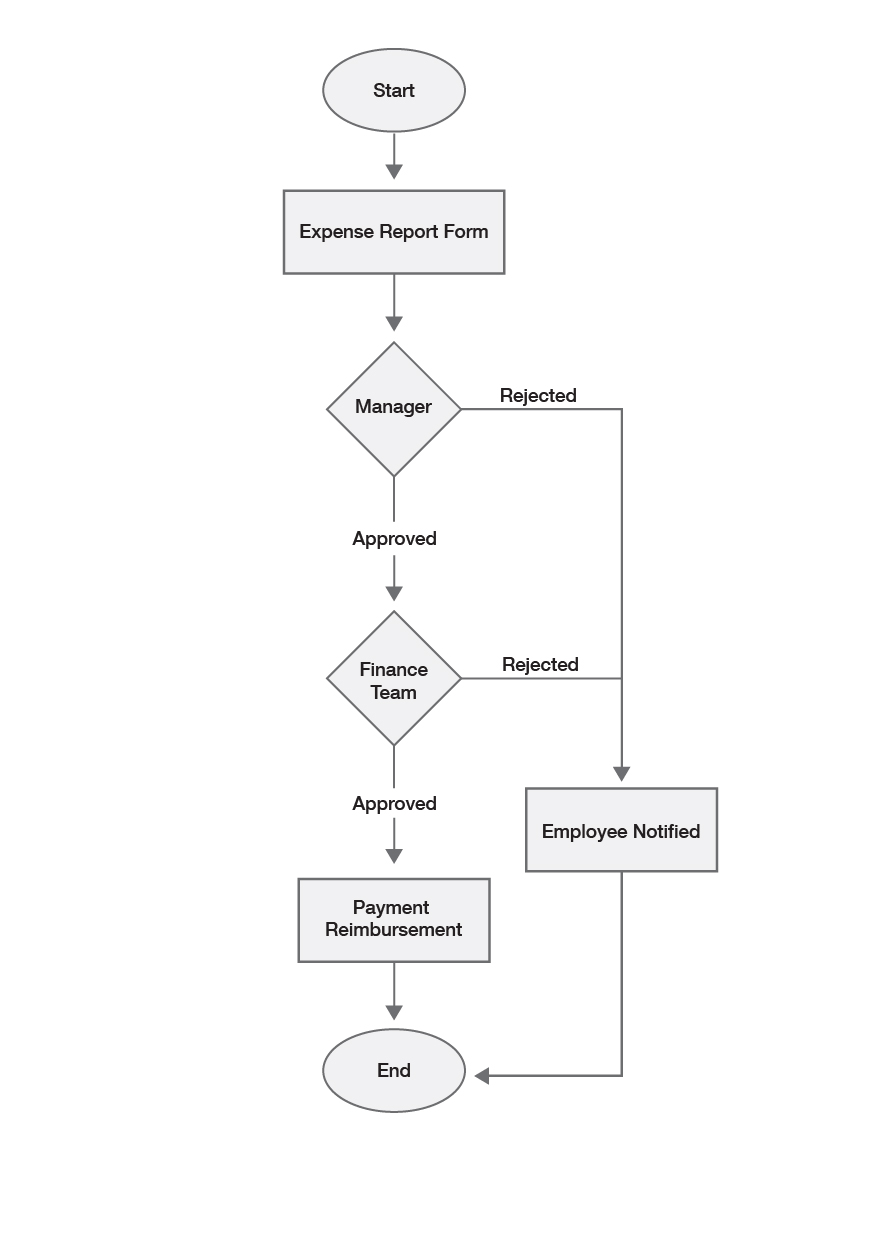
Figure 3.11 Example CRM new-lead workflow (p. 83)
Chapter 3: Design and Implement, Section: DESIGN: The Power of Maps
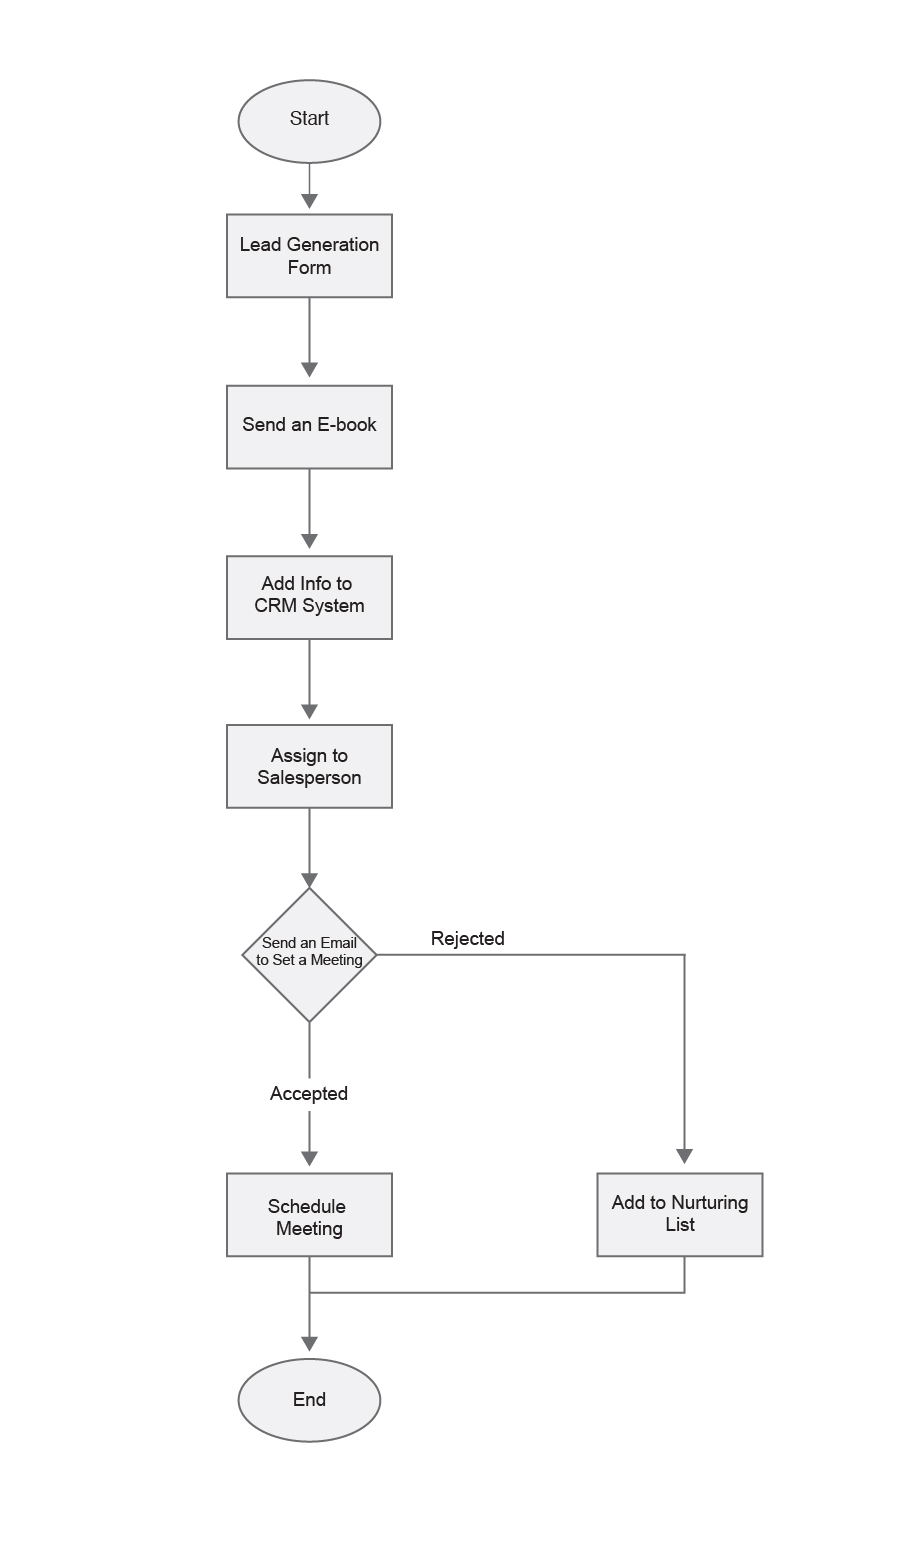
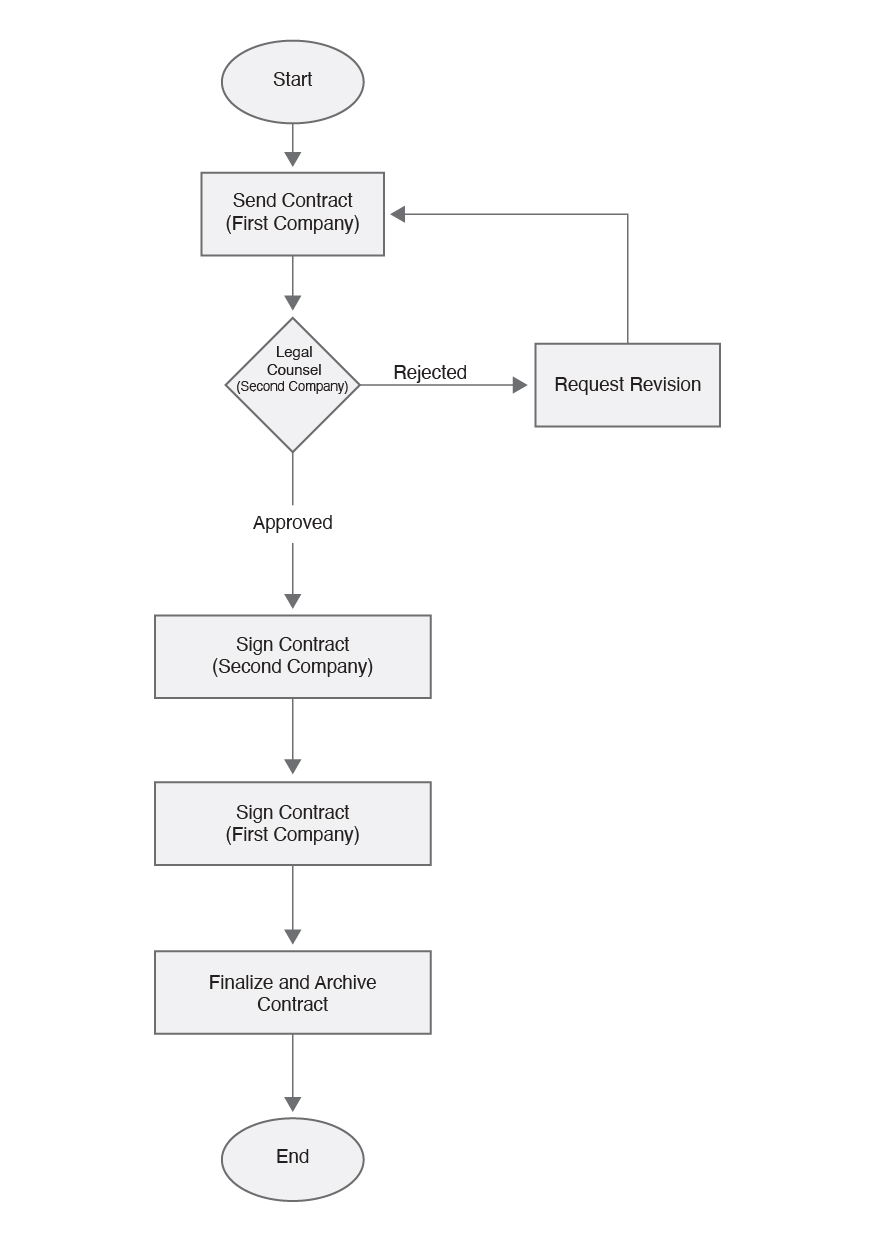
Figure 3.12 Example new contract workflow (p. 86)
Chapter 3: Design and Implement, Section: DESIGN: The Power of Maps
Click here to download them all.